
This was a paper published during my Ph.D. which I presented at the Humanoids 2019 conference in Toronto, Canada.
Abstract
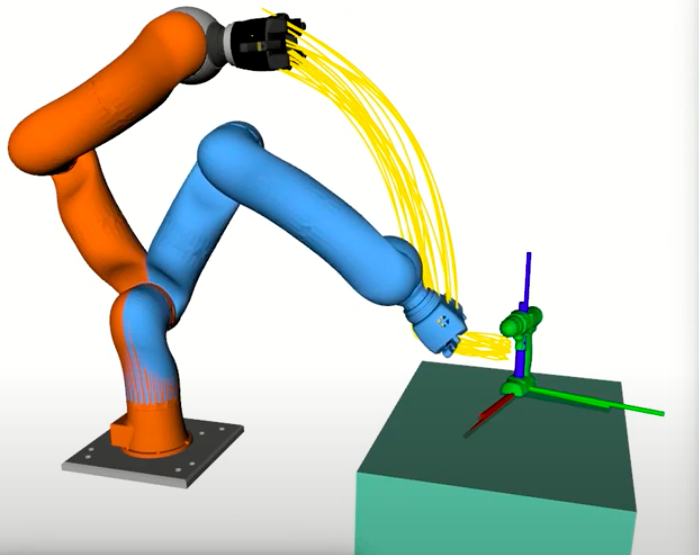
We present a novel method for learning hybrid force/position control from demonstration. We learn a dynamic constraint frame aligned to the direction of desired force using Cartesian Dynamic Movement Primitives. In contrast to approaches that utilize a fixed constraint frame, our approach easily accommodates tasks with rapidly changing task constraints over time. We activate only one degree of freedom for force control at any given time, ensuring motion is always possible orthogonal to the direction of desired force. Since we utilize demonstrated forces to learn the constraint frame, we are able to compensate for forces not detected by methods that learn only from the demonstrated kinematic motion, such as frictional forces between the end-effector and the contact surface. We additionally propose novel extensions to the Dynamic Movement Primitive (DMP) framework that encourage robust transition from free-space motion to in-contact motion in spite of environment uncertainty. We incorporate force feedback and a dynamically shifting goal to reduce forces applied to the environment and retain stable contact while enabling force control. Our methods exhibit low impact forces on contact and low steady-state tracking error.
Please see the paper (arXiv version) for details on this work.
@inproceedings{conkey2019learning,
  title={Learning Task Constraints from Demonstration for Hybrid Force/Position Control},
  author={Conkey, Adam and Hermans, Tucker},
  booktitle={2019 IEEE-RAS 19th International Conference on Humanoid Robots (Humanoids)},
  pages={162--169},
  year={2019},
  organization={IEEE},
  url={https://ieeexplore.ieee.org/document/9035013}
}
Software Development
This project was perhaps my most challenging project to get running on a real robot that I worked on during my PhD. It required executing force control policies on a variety of surfaces with different friction coefficients, and designing a control and hardware setup for safely executing policies on the robot was a real challenge (i.e. I needed to be sure the controller would not go unstable and damage the robot or sensor). Perhaps the most enjoyable piece was developing the demonstration interface on the Baxter robot, which provided a user-friendly way to give kinesthetic demonstrations of a task.
| Repository | Description |
|---|---|
| ll4ma_movement_primitives | Custom implementation of Dynamic Movement Primitives, including a Cartesian variant conducive to encoding policies in task space. |
| ll4ma_robot_control | Controller framework for real-robot execution, including a custom hybrid force-position controller with some added heuristics that encourage stability and safe execution. |
| ll4ma_robot_interface | Abstraction framework for easily running controllers on a variety of different hardware platforms. |
| baxter_util | Framework for recording kinesthetic demonstrations on the Baxter robot using the on-board buttons and screen on the robot. |
| optoforce_etherdaq | Fork of etherdaq_ros where I added a contact classifier and some filtering code for force signals, as well as ROS infrastructure for easier use. |
| dmp_hybrid_control | A more self-contained package for the experiments done in the paper. |
Hybrid Force-Position Controller
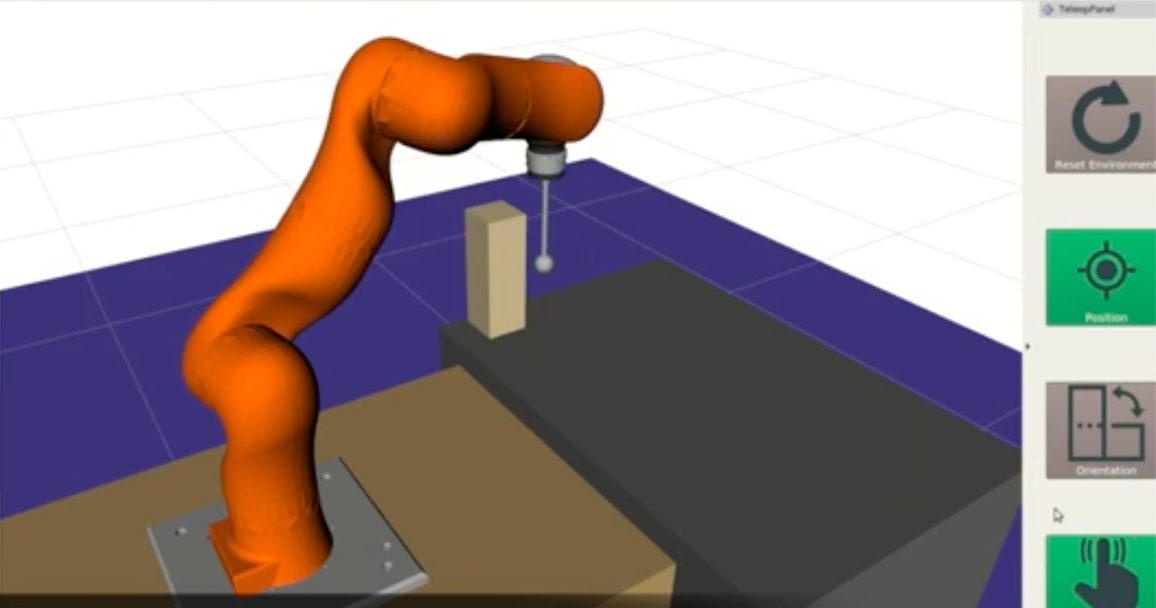
The controller we used is well-studied and has been in use in some form since the early 1980s, e.g. Raibert and Craig’s 1981 paper Hybrid Position/Force Control of Manipulators. We used a formulation closely resembling Oussama Khatib’s operational space formulation. The core idea is that there are some dimensions in your task space (XYZ) for which you want to control motion, and others for which you want to control the amount of force applied. For example, if you are cleaning a window, you primarily want to apply an appropriate force in the direction of the window pane such that you clean the surface without breaking the window, and you want to be able to move along the plane of the window to perform a wiping motion. Our core novelty in the paper was learning a constraint frame from a human demonstration for tasks where it would be very difficult to specify one static frame in which to activate dimensions for position or force control.
A couple interesting things about the early force control papers is that they would often assume surfaces to be frictionless, and that the robot was already in contact with the surface it would slide on. These are convenient theoretical assumptions but in practice it means the controller formulations do not work very well out of the box. To do my experiments, I had to modify the control law slightly and introduce safety checks in my software infrastructure to detect when the controller was likely doing something bad and kill the controller automatically. This made things less reliant on my reaction time with the E-Stop! Some tricks I used:
- Attenuate the force error by a constant factor when the error is negative. This was important for making contact with the surface moving from free space. Without this trick, the end-effector would hit the surface and pop right back off, sometimes bouncing up and down indefinitely. This trick had one parameter to tune and enabled the robot to make stable contact without popping back off the surface.
- Kill the controller if sensed forces exceed a threshold. This was a simple but effective safety mechanism: if the force sensor mounted on the robot’s wrist registered too much force being applied, stop controlling! The control infrastructure was set up such that if my controller stopped sending commands, it would revert back to the built-in robot’s controller and stop moving. This reduced my reliance on the E-Stop and led to fewer scary instances while I was tuning controller gains and such.
- Filter force data read from the force sensor. This is another well-known technique, but absolutely necessary. I learned first-hand how noisy force data can be, and if you’re not filtering it with a low-pass filter you will simply not be able to use it in a controller. This was particularly true for sliding on higher-friction surfaces. We slid on sandpaper! All of those bumps introduce a lot of blips in the force readings and it was important to keep the readings stable with filtering.
Recording Task Demonstrations
Perhaps my favorite thing I implemented for this project was the task demonstration recording interface. The Baxter robot I used has a beautiful human-robot interface already with several different buttons onboard, an onboard display, and a user-friendly kinesthetic teaching interface where you move the robot arm simply by grabbing its wrist to put the arm in gravity compensation mode. However, I had some specific needs for doing experiments, including starting/stopping data recording, taring the force sensor, and returning the arm to a default starting configuration. I spent some time building out a framework for performing my experiments utilizing all of the nice onboard features of the Baxter robot.
Here were the core features I implemented:
- Status cues displayed on the on-board display on Baxter’s head. I made the screen rotate towards the user and display intuitive feedback for the actions the user was initiating. For example, it would say READY when it was ready to start recording a new demonstration, and RECORDING when it was actively logging data.
- Tare force sensor with a button press. I had a 6-axis force/torque sensor mounted to Baxter’s wrist that I was logging data from. The sensor readings would drift over time and it was important to periodically tare the sensor (zero out the readings) so that each demonstration had comparable force sensor readings. I connected a button on the arm to a ROS service I wrote to perform a tare operation via the sensor driver.
- Return arm to home position. I wanted all of the demonstrations for a particular task to start from a common arm configuration, so I connected a button on the back of the Baxter robot to a ROS service that would command the arm to a set home configuration. After each demonstration, I could hit the button to have the robot arm return to its starting configuration and start a new demonstration session with very little delay. I additionally made another button configured to set a new home position, so that I could workshop different configurations for different experiments.
- Start and stop data recording. I connected a button on Baxter’s arm to start and stop data recording. This made it very simple to start recording at the beginning of a demonstration and stop it right after without having extra time before or after that I would have to trim later. This was connected to a backend logging framework I wrote to record all the data I needed for experiments, including robot joint positions and torques as well as force sensor data. The user also had the option to discard data if it was a bad demonstration or to keep it, again all with button presses on the arm and cues on the display!
If you watch the demo video below, you can get a sense of how user-friendly this framework was, and how quickly I could do my experiments with it! It also served as a demonstration recording framework beyond this paper that could be used by others in the lab.
Summary
This paper took a lot out of me, in part because it was rejected multiple times and I had to persist in working on it. It was my first paper submission as Ph.D. student as well, which made it difficult to stay positive about my trajectory in research when I was only getting negative feedback.
But, it did get published eventually! And looking back on it, it was a truly impressive feat of engineering getting everything running on the Baxter robot, especially when having to work with noisy force sensors and a robot not designed for precise control. Struggling through the implementations early on made me all the more capable as a robotics engineer throughout my Ph.D. and beyond.